Step 1A – Open Image in Photoshop
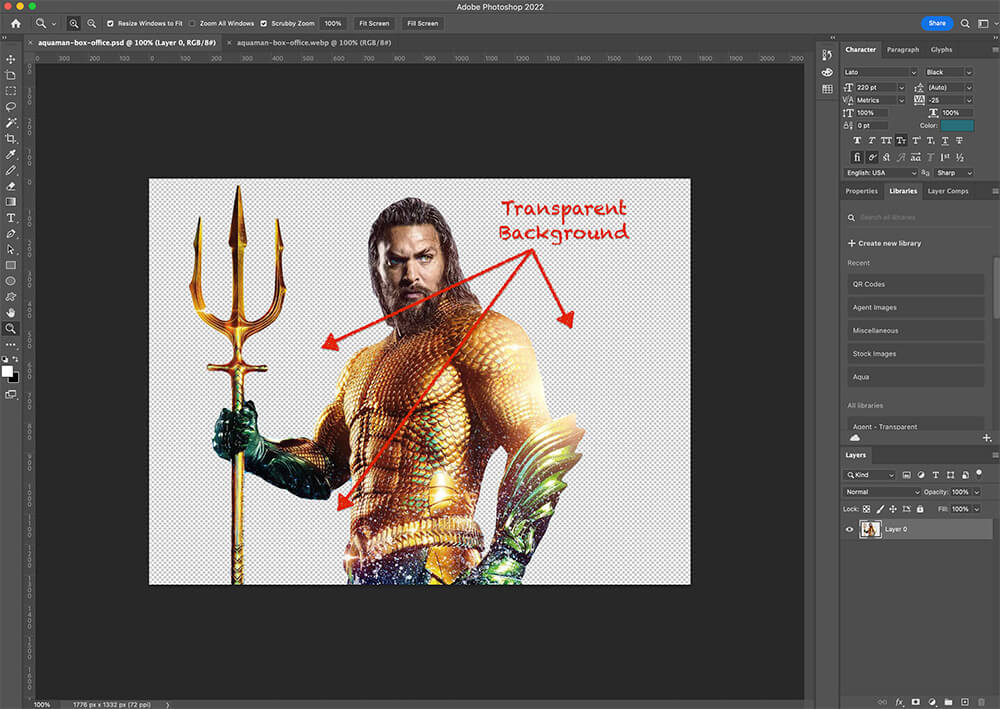
If the agent image has a background that does not match the look of our website, please delete the background to make it a transparent image. If the image already has a transparent background, you may skip to Step 2.
Step 1B – Delete Background
Use Adobe Photoshop to select the background area and delete it. Be very thorough in making the image edges very clean and smooth.
Step 1C – Save File as PSD
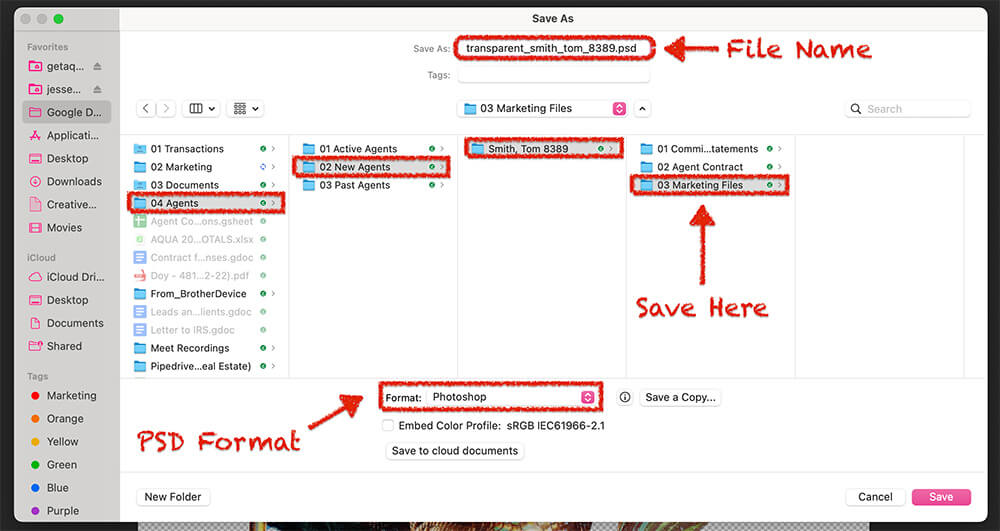
In the menu, click the file and Save As. Save it in the marketing folder.
➡️ File Name: transparent_lastname_firstname_agentid.psd
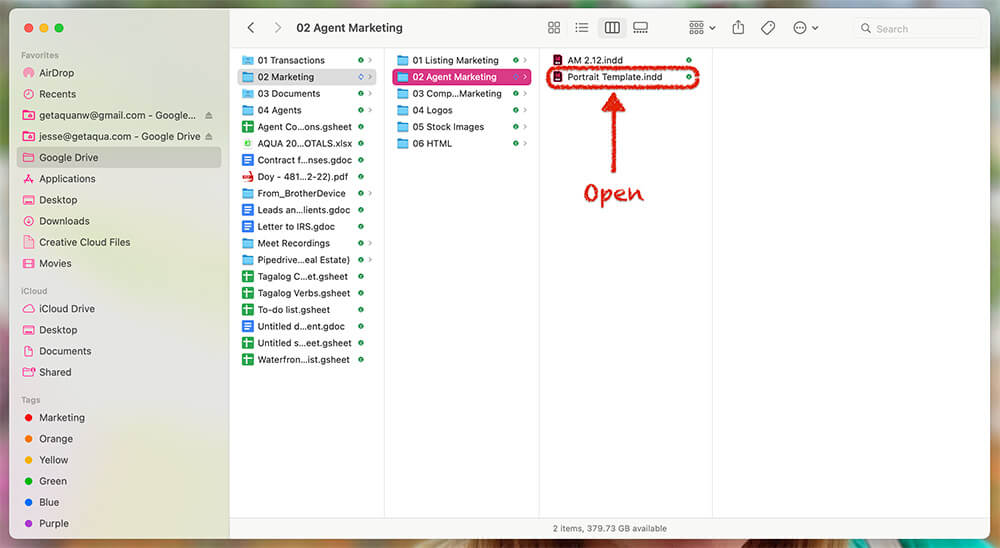
Step 2A – Open Indesign Portrait Template
Open the InDesign file named “Portrait Template.” The document in InDesign will open so you can begin making edits.
Note: If you skipped step 1 because the agent image came to you already as a transparent PNG, please save it in the agents marketing folder.
➡️ File Name: transparent_lastname_firstname_agentid.png
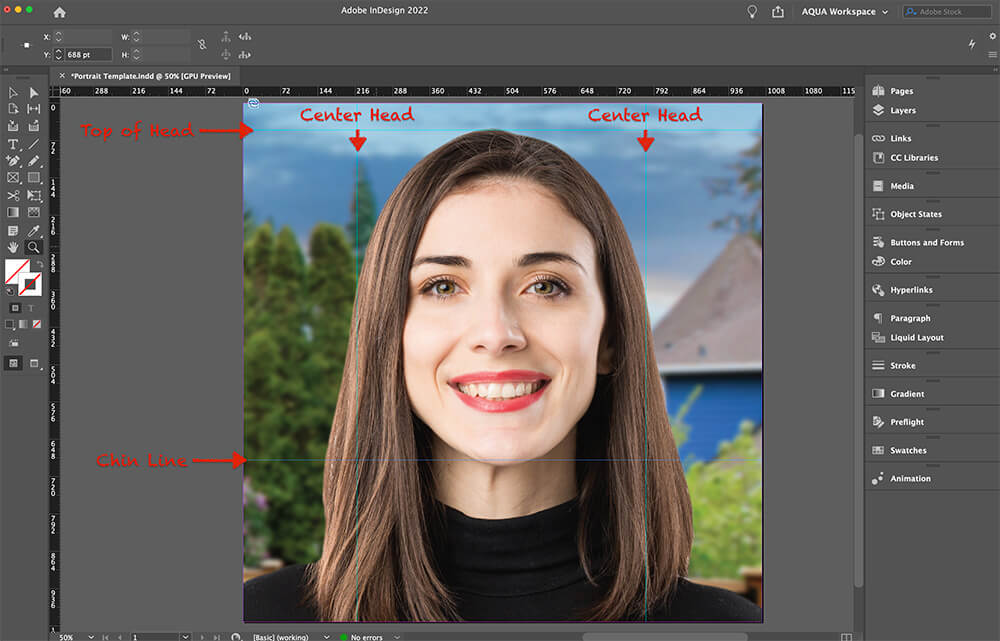
Step 2B – Import Agent Photo
The light blue guidelines show where the head should be centered. The top line is for the top of the head should be. The bottom is where the chin should align. Keeping the images consistent across all marketing pieces and websites is essential.
Note: If an agent has big hair, you may need to adjust beyond these lines.
1) Go to “Layers” and select the layer “Agent Image.” The blue dot next to the title indicates which layer is selected.

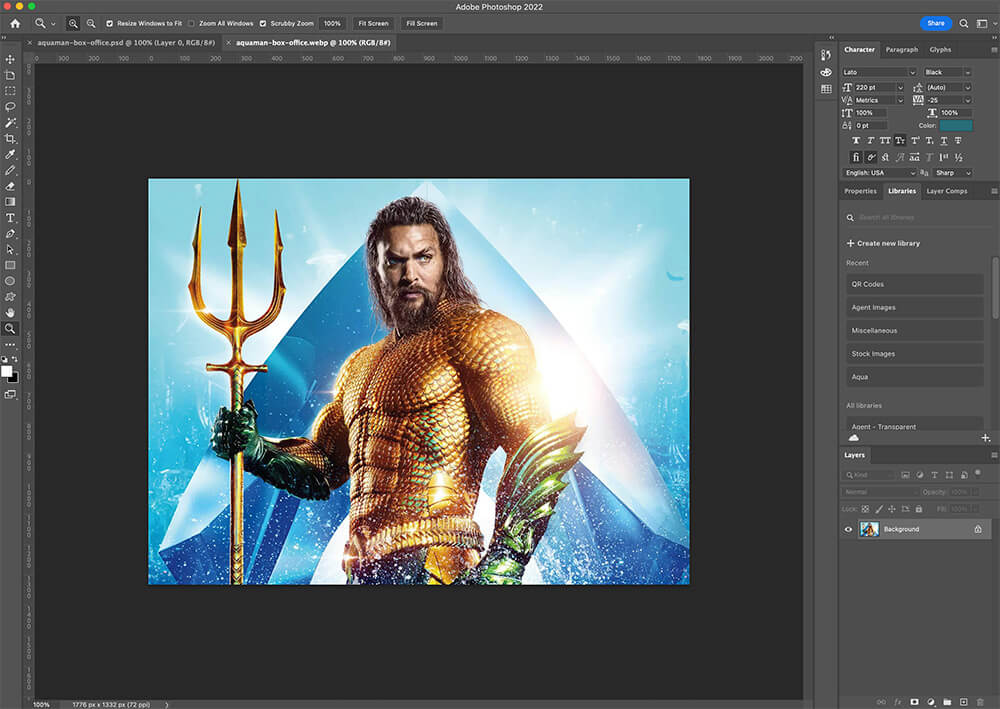
2) Once you have selected the image you wish to change, go to the menu and select “File,” then select “Place.”
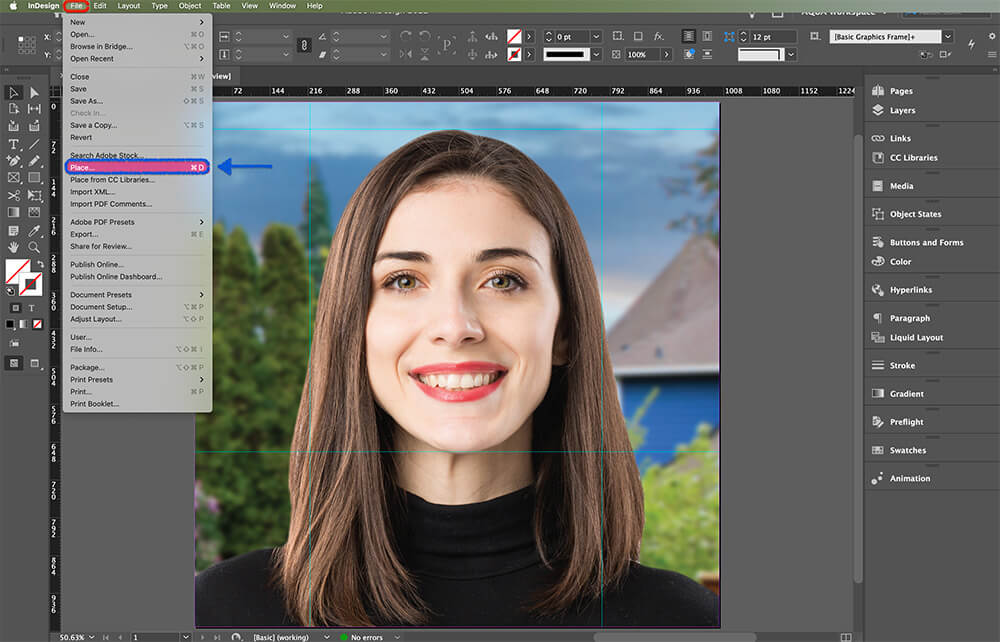
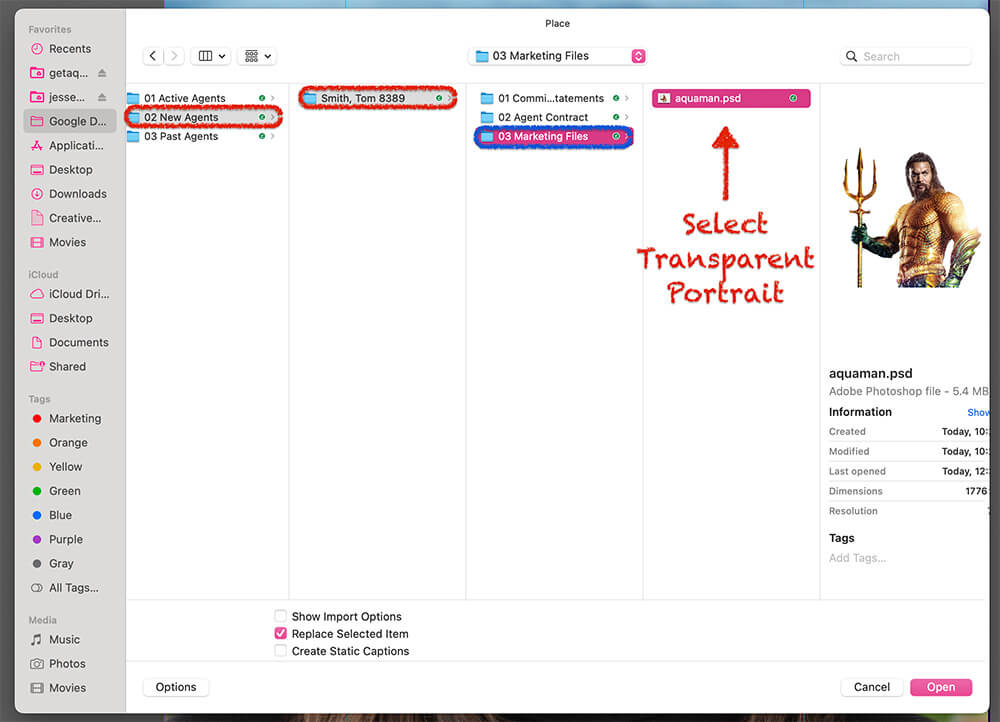
3) Select the agent’s transparent image to import it into the template. This image is either a transparent image the agent provided or the image you created in Step 1.
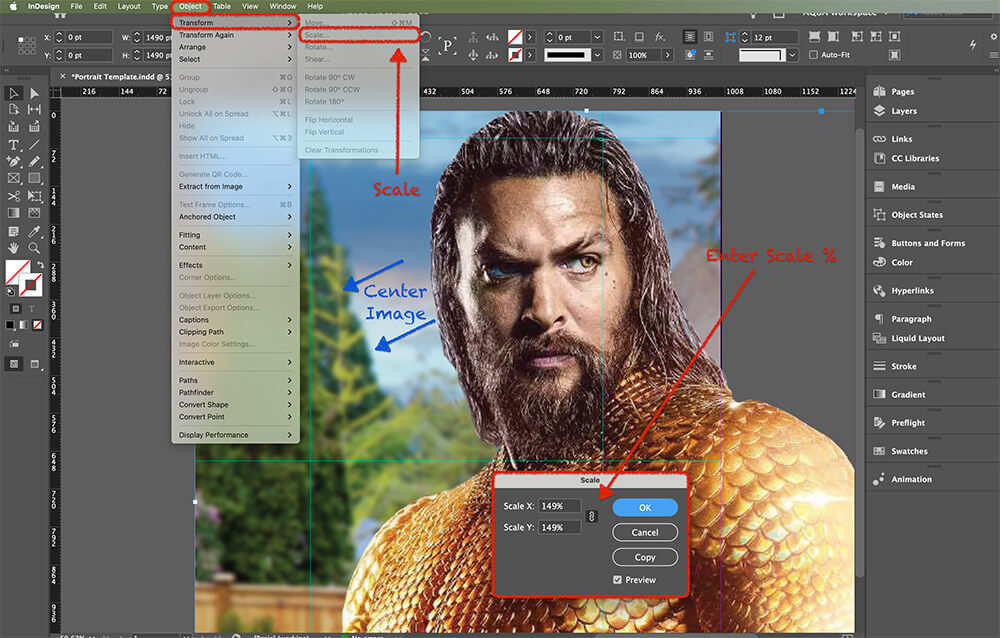
Step 3 – Center & Resize Image
Now that the image is imported, you can see if the image is too big or too small. You may resize the image by going to the menu and selecting “Transform” then “Scale.” The scale menu will appear, and you can guesstimate how much you need to increase or decrease the size. Reposition the image to the center and repeat the process until the image fits perfectly within the guidelines.
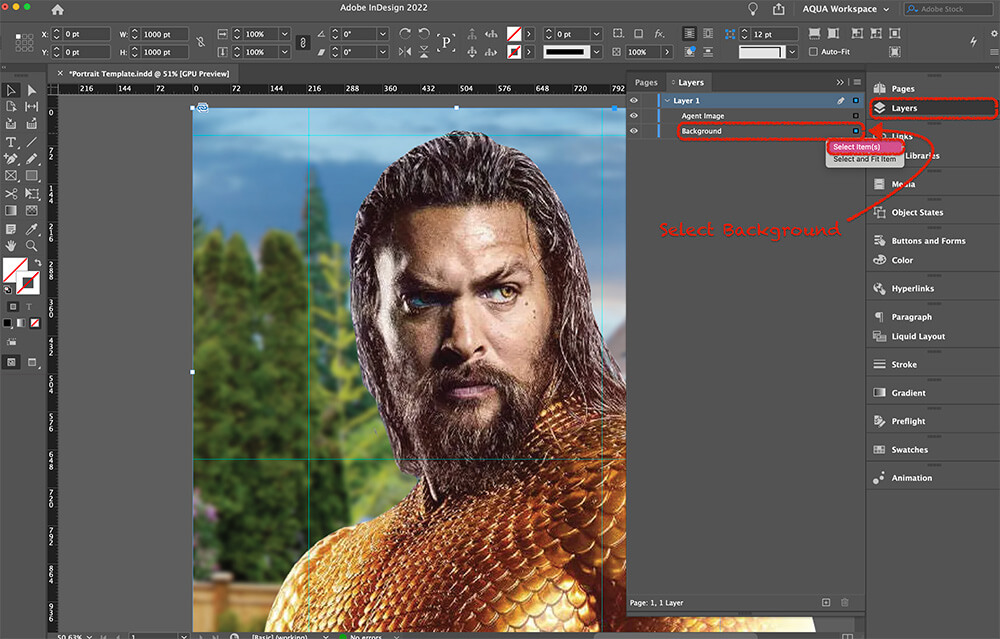
Step 3 – Edit Background
1) Go to “Layers” and select the layer “Background.” The blue dot next to the title indicates which layer is selected.
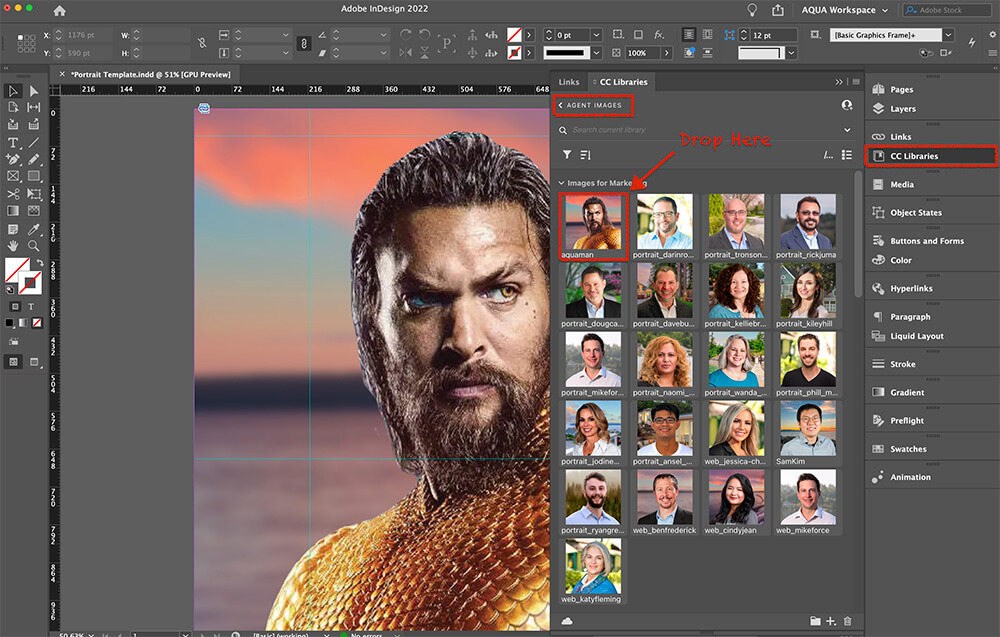
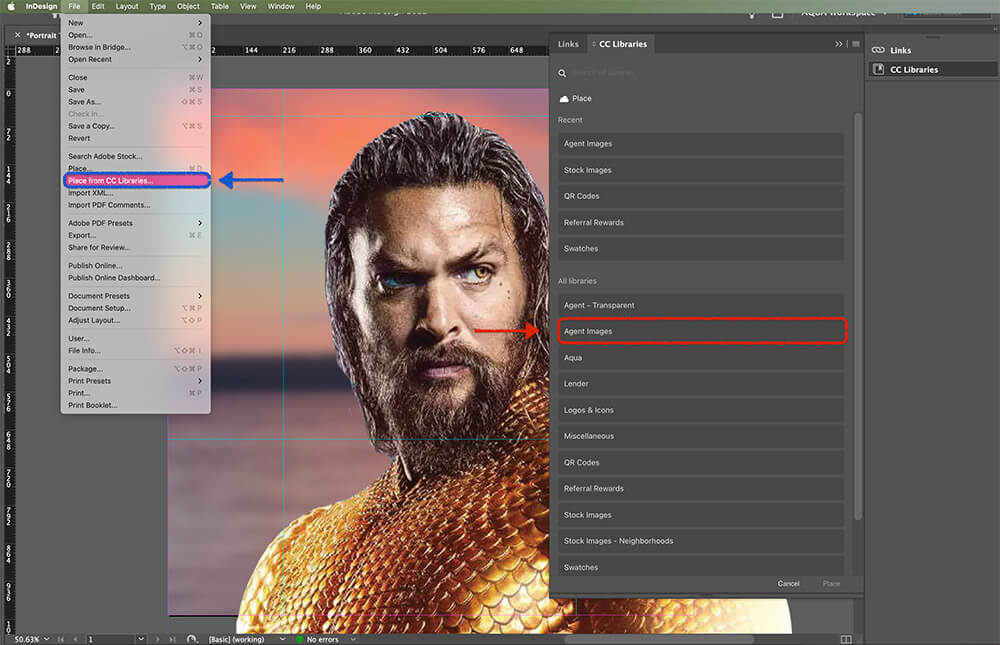
Once you have selected the layer you wish to change, go to the menu and select “File,” then select “Place from CC Libraries.” Then choose the “Agent Images” folder in CC Libraries.
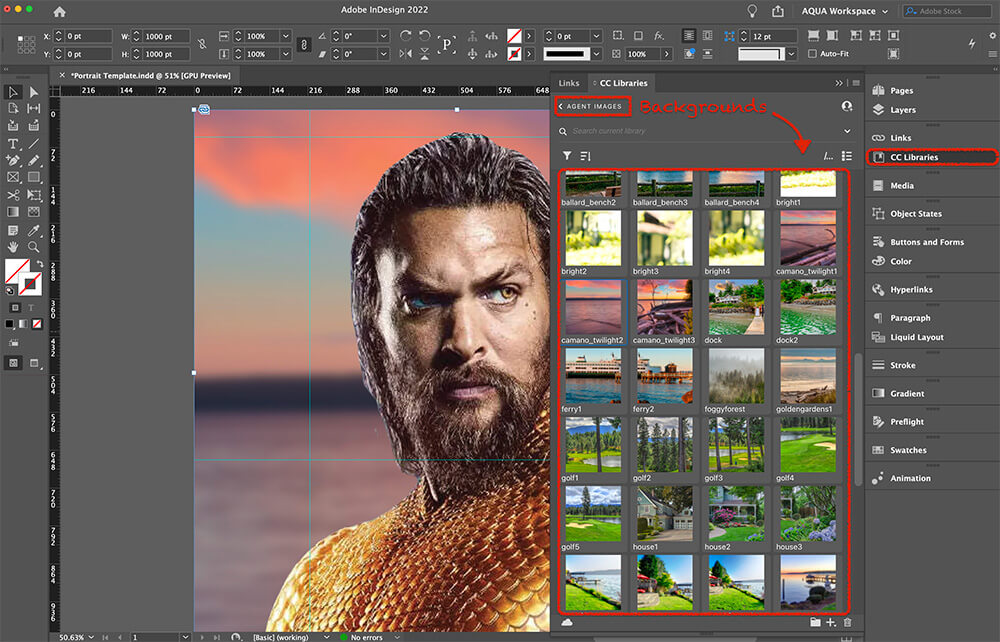
3) Select a background that enhances the image. You may wish to try several before deciding which one looks best. When selecting an image, remember the lighting and the agent’s persona. If the agent’s image is darker, you may wish to choose an evening photo. If the agent image is very bright, go with a bright daylight shot. Also, do not be repetitive. Look at the GetAqua.com website and try to choose an image that varies the image order. We do not want every agent to have the same background.
Step 3 – Export & Save
1) The next step is to export the final product for use. Go to the menu, select “File,” and then select “Export.” 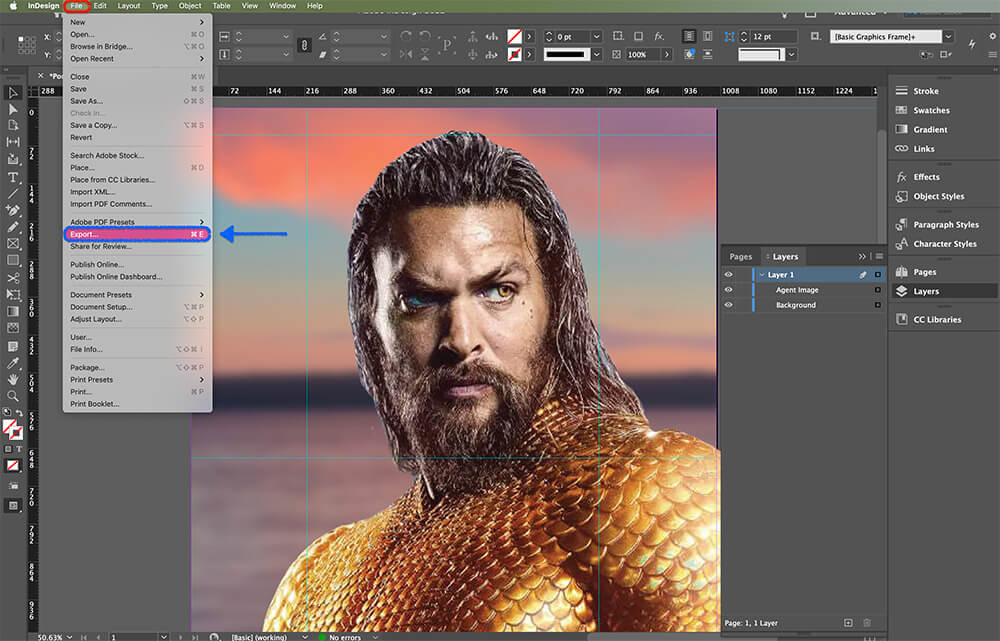
2) Save to the agent’s marketing folder. Export as a JPG file.
➡️ File Name: portrait_lastname_firstname_agentid.jpg
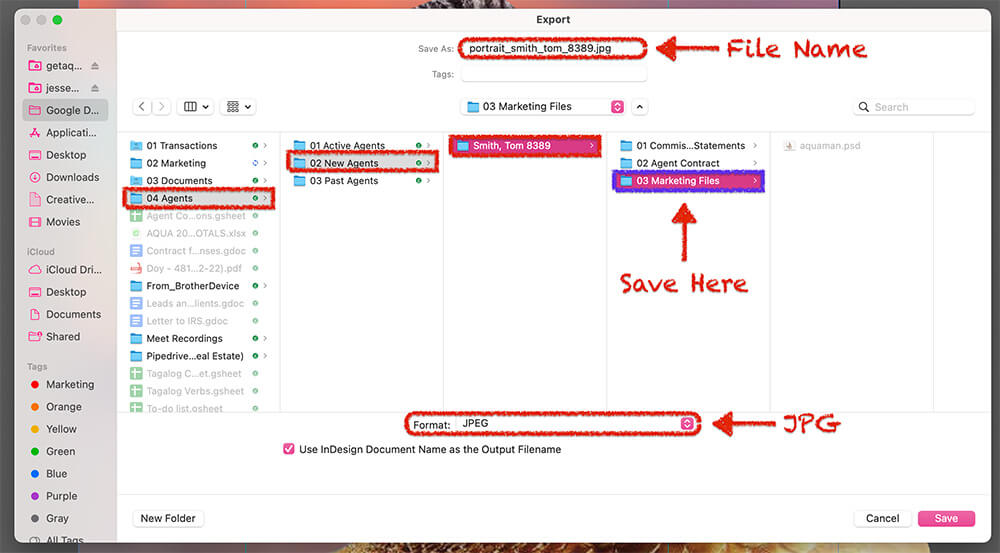
3) Choose Image Quality as “High” and make Resolution (ppi) at “150.”
![]()
Step 4 – Save to CC Libraries
The last step is to save the file to Adobe CC Libraries. Drag and drop the image into the “Agent Images” folder. Be sure to put it in the subgroup with the other agent portraits.