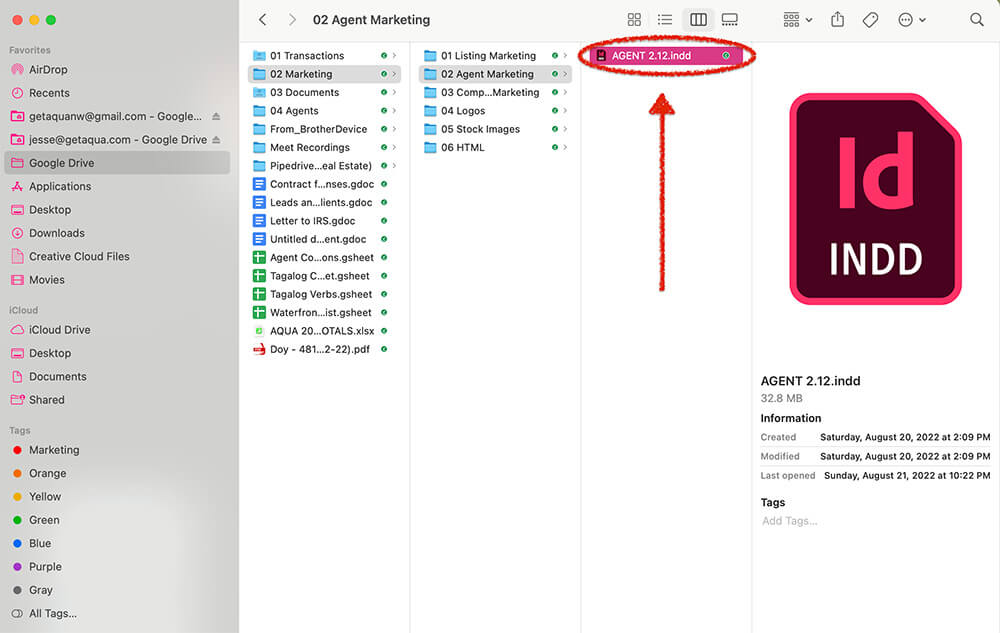
Step 1 – Open Agent Marketing File
Find the agent marketing file in Google Drive and open the file to start editing it in Adobe InDesign.
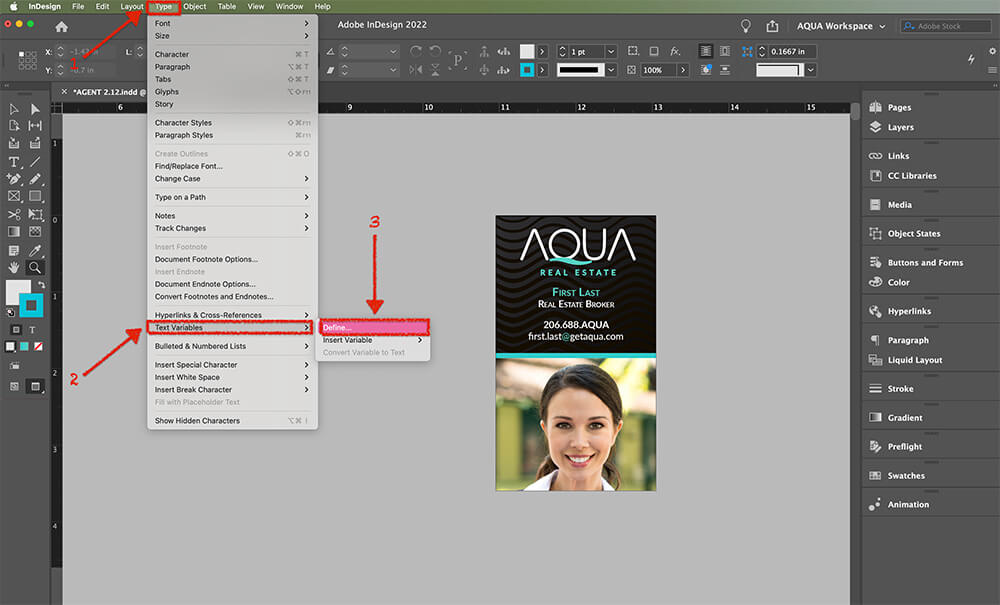
Step 2 – Add Agent Information
Go to “Type.” Then click “Text Variables.” Then click “Define.” Here is where you can change the variable text on every page in the document.
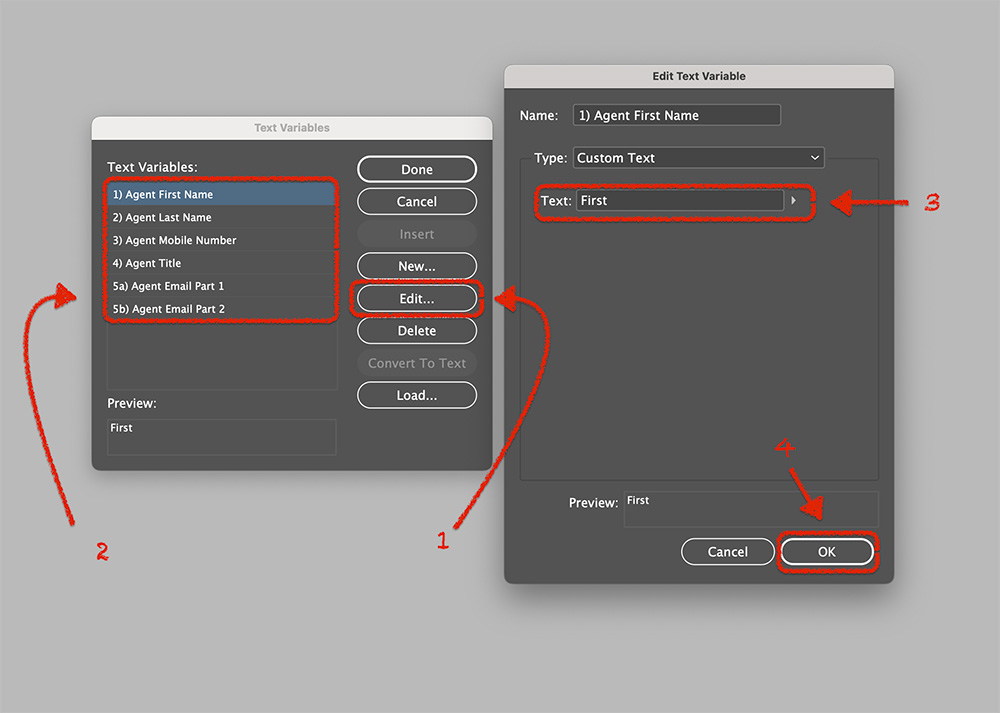
Edit the text for each value. Click “Edit” or double-click the value you wish to edit.
1 & 2) Agent’s Preferred Name if they don’t want to use their Legal Name.
3) Enter the phone number with a “.” between area code, prefix, and suffix.
4) Real Estate Broker, unless instructed otherwise.
5a) The first half of the email. Usually firstname.lastname if doing a company email.
5b) The second half of the email. Only change this if they are not using a company email.
6) Agent ID# (not pictured). It can be found in PipeDrive.
When done, click “OK” and scan the document to see how the text looks on all the pages.
Step 3 – Add Agent Photo
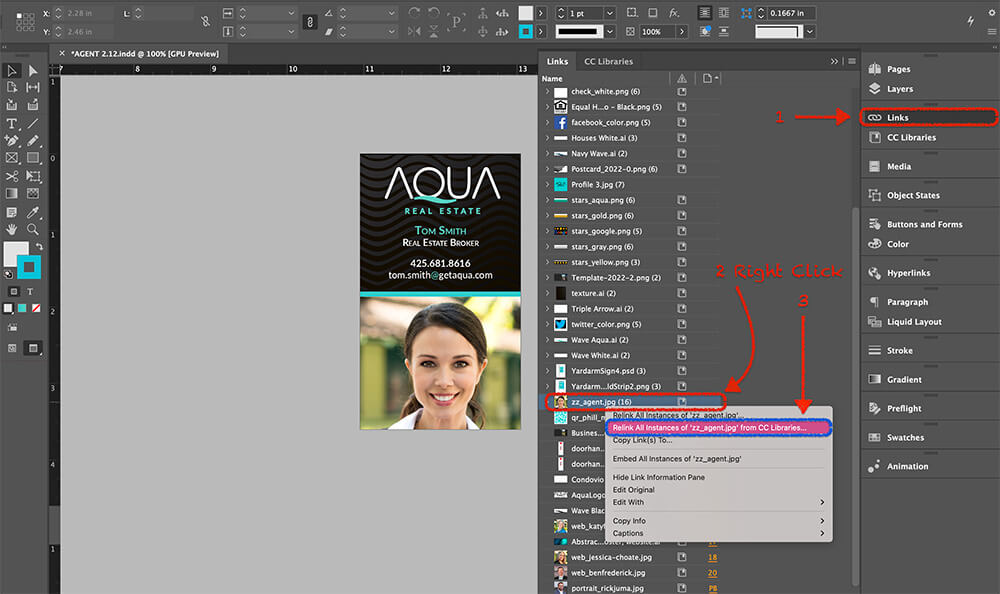
1) Go to the right navigation panel and select “Links.”
2) Then locate the photo file you wish to change “zz_agent.jpg.”
3) Right click to bring up the options menu.
4) Select “Relink All Instances of “zz_agent.jpg” from “CC Libraries.”
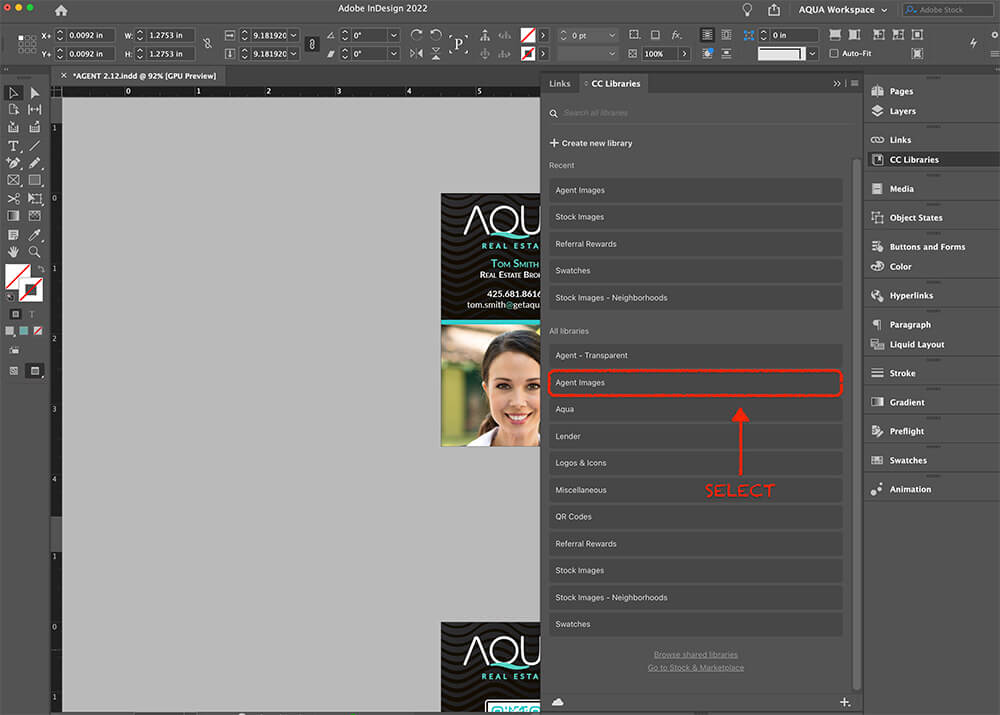
5) Select “Agent Images” folder in the “CC Libraries” to choose the agent image you wish to use.
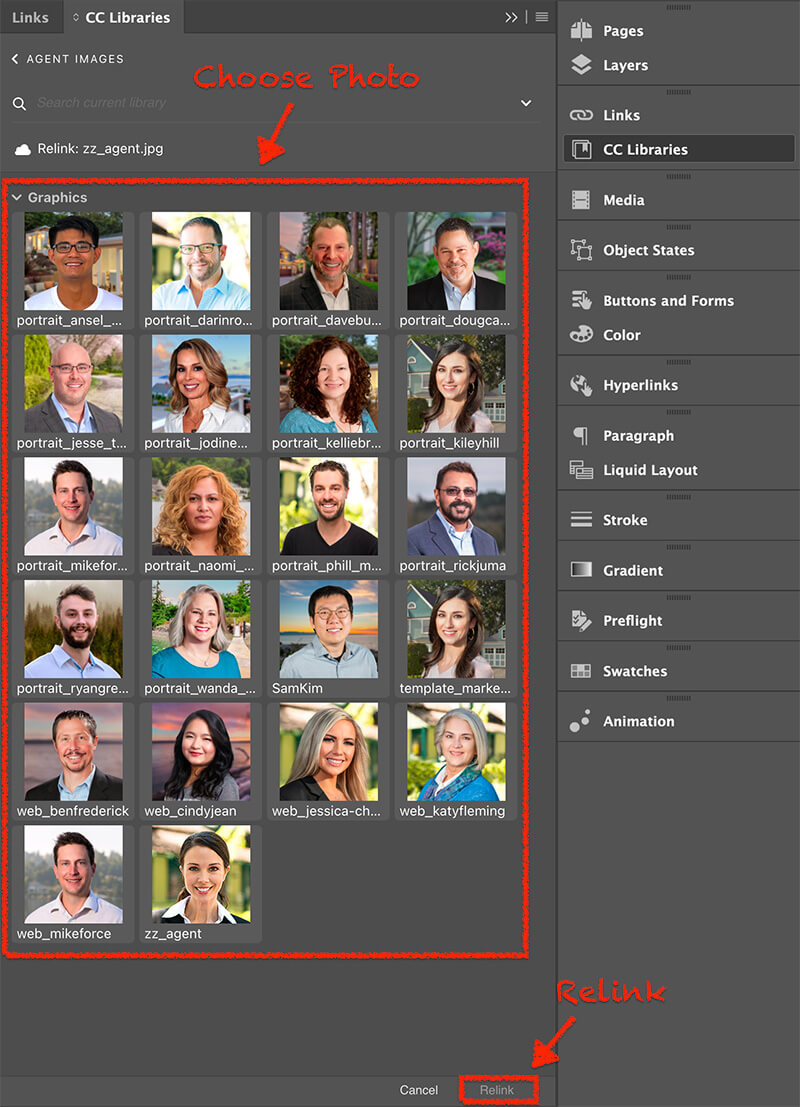
6) Locate the image you wish to add to the marketing and click “Relink.”
The agent image should now appear on all the marketing pieces. Check to make sure the image is displayed correctly and is in alignment. You may make any edits as necessary.
Step 4 – Add QR Code
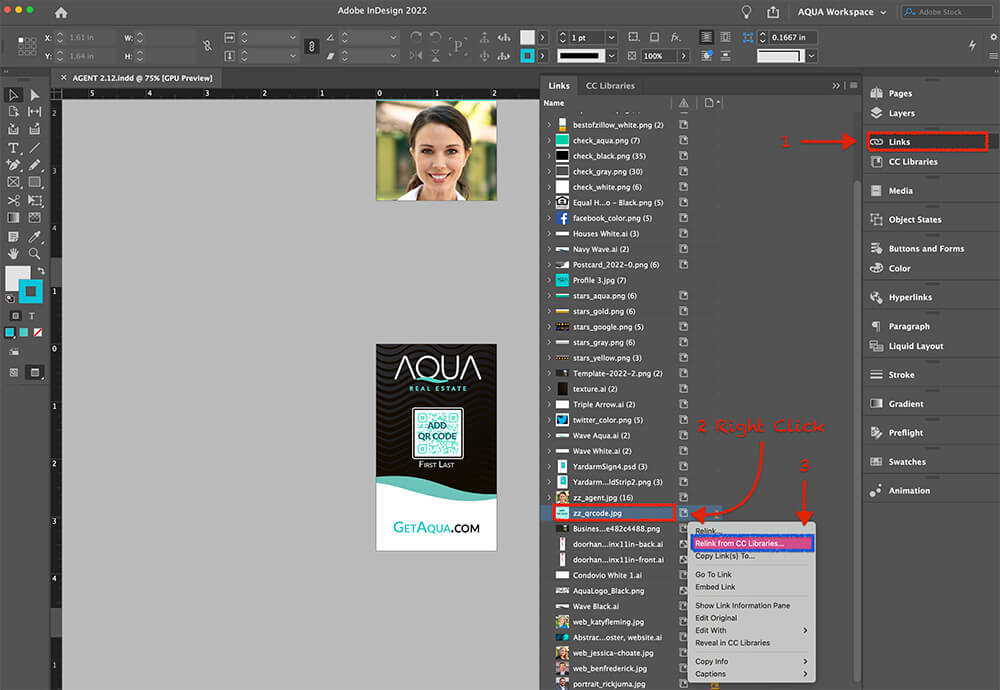
1) Go to the right navigation panel and select “Links.”
2) Locate the photo file you wish to change, “zz_qrcode.png.”
3) Right-click to bring up the options menu.
4) Select “Relink All Instances of “zz_qrcode.png” from CC Libraries.”
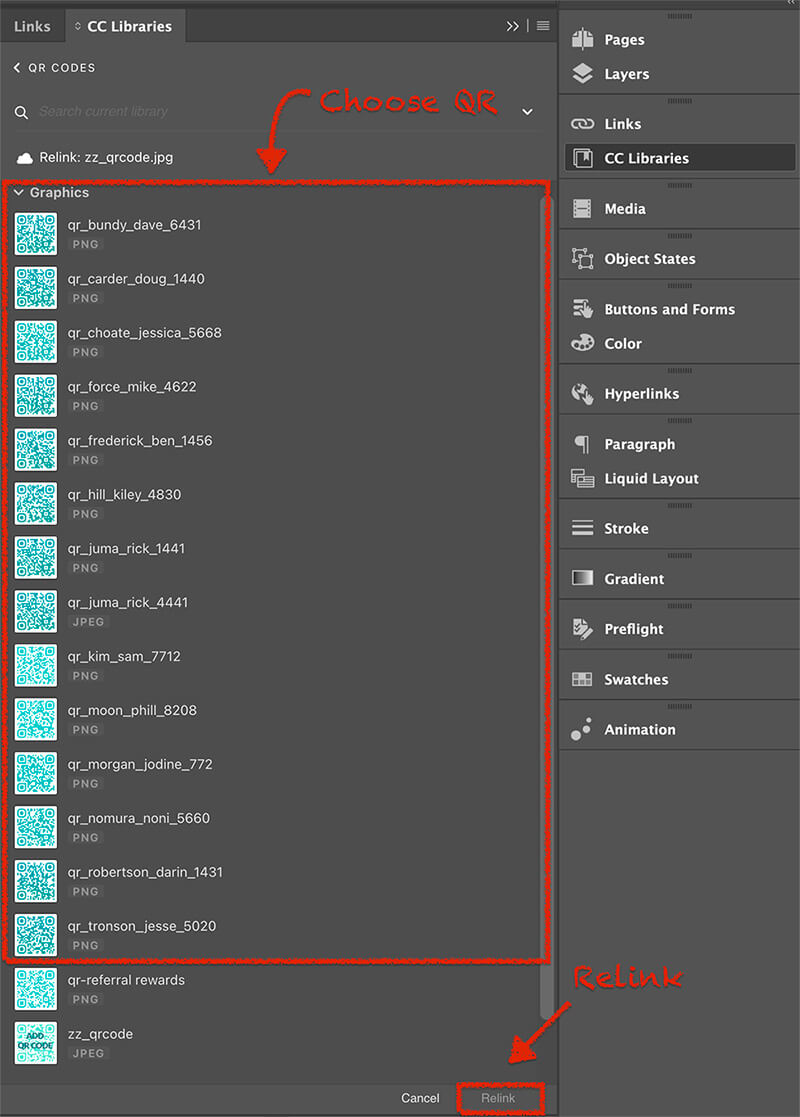
5) Select the “QR Codes” folder in the “CC Libraries” to choose the Agents QR code.
6) Locate the QR code you wish to add to the marketing and click “Relink.”The QR code should now appear on all the marketing pieces. Check to make sure the image is displayed correctly and is in alignment. You may make any edits as necessary.
Please Note: If you can not find the agent’s QR Code, it has not been created. Please follow the steps at the link below to create a QR Code for an agent.
Step 5 – Save Master File to Google Dive
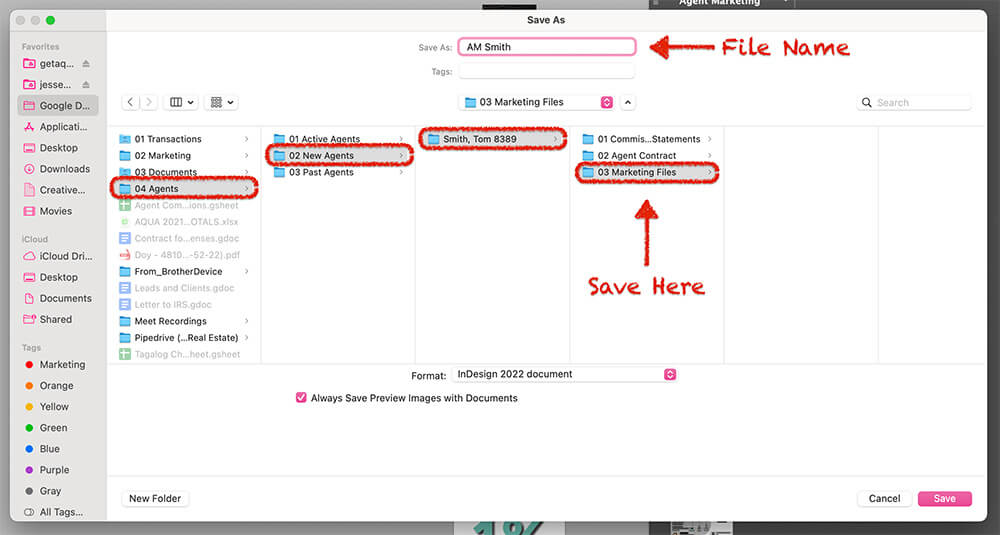
Save a copy of the file in case edits are needed in future. Save the file to the agents Marketing File folder.
➡️ File Name – AM Name.indd
Step 6 – Export Files
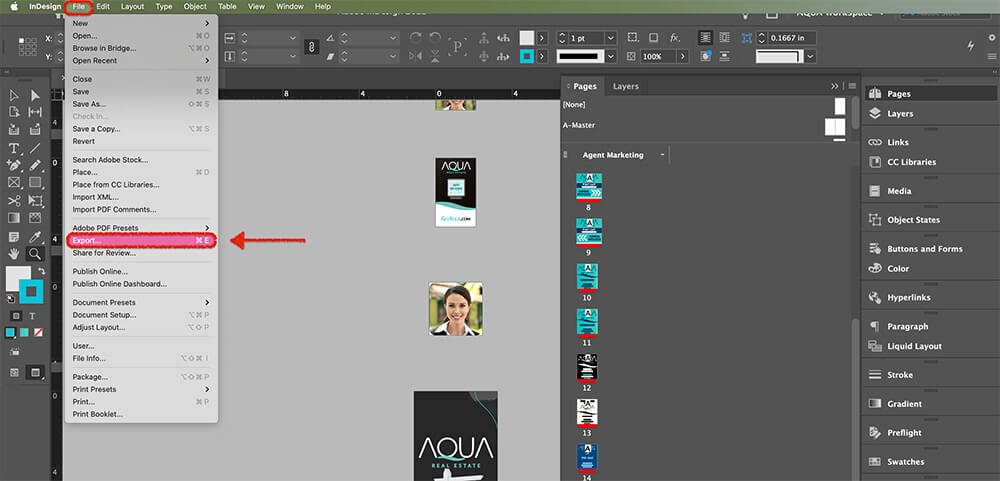
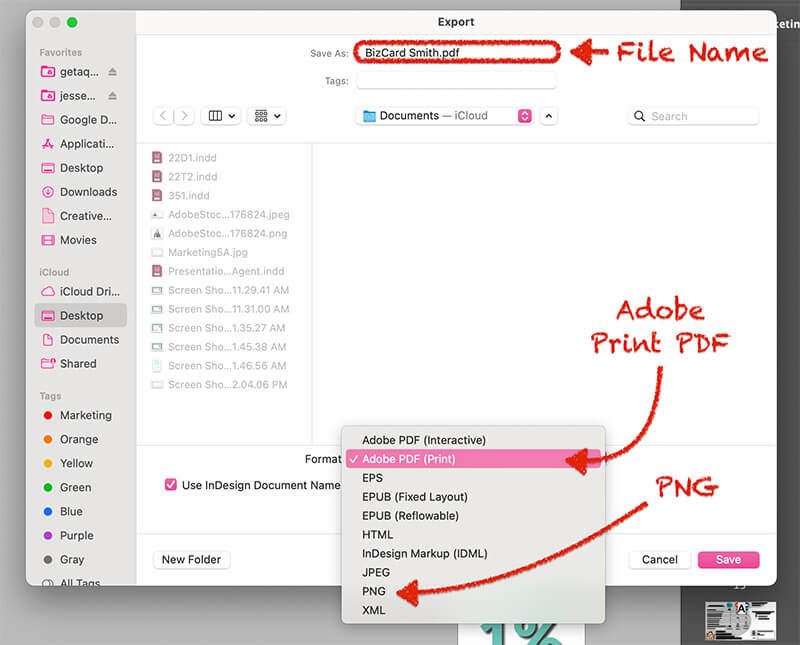
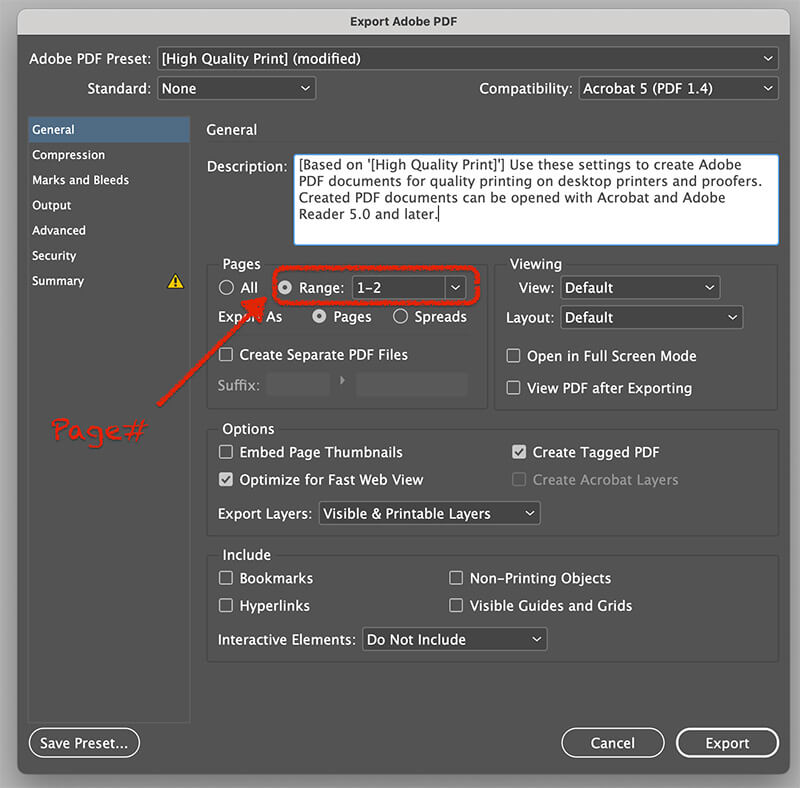
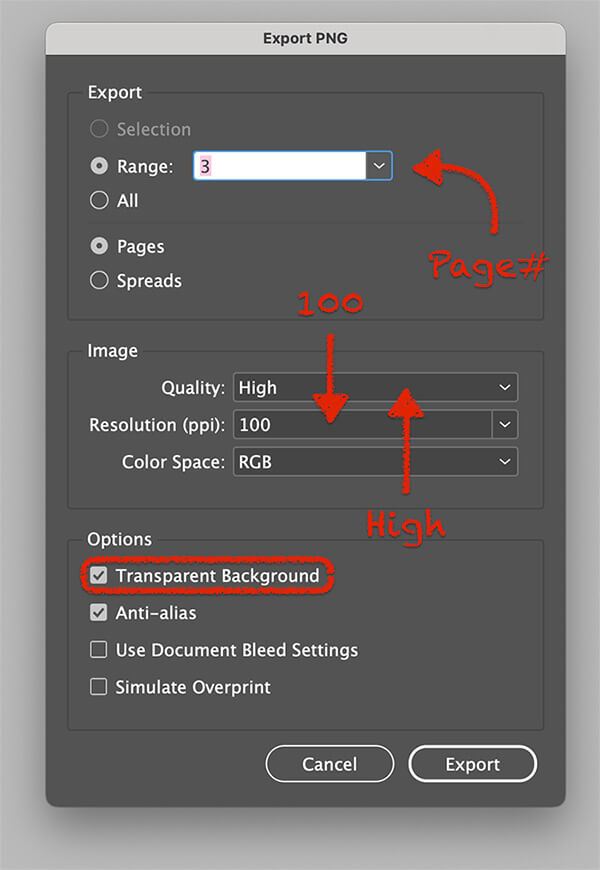
Export a Print PDF or PNG of each marketing piece following the formats below. Save the files to the agent’s Marketing File folder.
Business Card | PDF (Page 1-2)
➡️ File Name – Biz Card Name.pdf
Email Signature Photo | PNG (Page 3, High, 100, RGB, Transparent)
➡️ File Name – Signature Name.png
Door Hanger | PDF (Page 4 & 5)
➡️ File Name – Door Hanger Name.pdf
Sold Strip | PDF (Page 6)
➡️ File Name – Sold Name.pdf
Sign Rider | PDF (Page 7)
➡️ File Name – Rider Name.pdf
Directional Arrow | PDF (Page 8 & 9)
➡️ File Name – Rider Name.pdf
Open House | PDF (Page 10 & 11)
➡️ File Name – Open House Name.pdf
Yard Arm Sign | PDF (12 or 13 + 14)
➡️ File Name – Yard Arm1 Name.pdf
➡️ File Name – Yard Arm2 Name.pdf
➡️ File Name – Yard Arm3 Name.pdf
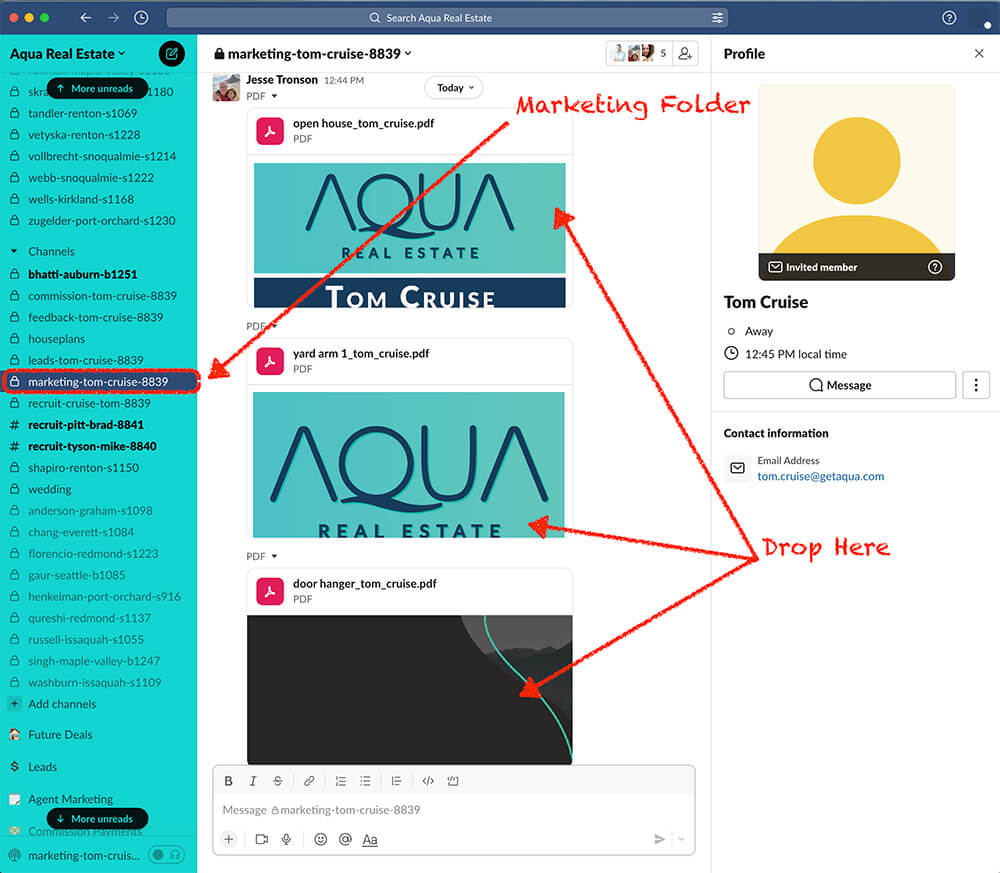
Step 7 – Upload Files to Slack
The agent will need access to the marketing files. Upload the files to the agent’s Slack marketing channel. Upload the following files…
Open House
Yard Arm Signs
Sign Rider
Sold Strip
HTML Email Signature
Door Hanger
Business Card
Portrait Photo
QR Code